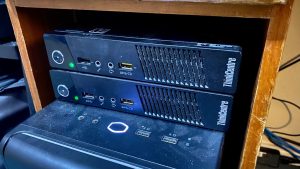
I have had a couple of these Lenovo ThinkCentre m53 computer for a while now, but I thought it would be great to be able to get more use out of them than just running Windows 10 and Ubuntu Linux bare metal, and install a hypervisor.
Out of the box, these units aren’t supported by VMware to install vSphere ESXi. But this is a challenge I was up for today.
System Specifications
These are the specifications of the unit that I will be using in this guide. There are some variants to this model and your experience may differ.
| Processor | Intel Pentium Processor J2900 2M Cache, 2.41GHz, up to 2.66GHz burst frequency |
| Form factor | Tiny desktop |
| Onboard SATA | 1 x SATA 3.0Gb/s controller 1 x connector on planar |
| Hard drive |
Kingston 2.5″ SATA, 6.0Gb/s, 128GB SSD (Non-Standard)
|
| Chassis Dimensions (W x D x H) |
179 x 182 x 34.5 mm |
| Power supply | 65W, autosensing, 88% PSU |
| Audio support | HD Audio, Realtek® ALC283 codec |
| Speaker | Internal speaker for business audio (1.5 watt) |
| Wireless | 11b/g/n wireless, PCIe Half Mini Card, Realtek RTL8723BE, WiFi + Bluetooth® 4.0 combo adapter, 1×1
11b/g/n wireless, PCIe Half Mini card, Intel Wireless-N 7260, WiFi + Bluetooth 4.0 combo, 2×2
|
| Ethernet | Gigabit Ethernet port, Realtek RTL8111GN, Wake on LAN® |
| Chipset | Intel System-on-Chip (SoC) platform |
| Security chip | None |
| Front ports | 1 x USB 3.0 (Always On)
1 x USB 2.0
Microphone (stereo)
Headphone / mic combo jack (stereo)
Rear ports
|
| Rear ports | 3 x USB 2.0 (1 x USB 2.0 occupied by optional TIO 23)
Ethernet (RJ-45)
VGA
Display Port (occupied by optional TIO 23)
|
Creating the custom ESXi Image
A big thanks to VMware Front Experience for their guides and tools for getting this up an running.
For us to get this working we will need the net55-r8168 driver pack that provides support for Realtek 8168/8111/8411/8118 based NICs.
Using the ESX Customiser PowerShell Script, we can create a ESXi ISO Disc Image that contains the drivers that are required to get things running.
Download the PowerShell script from the above link and save it to a location that is easily accessed via PowerShell.
Using PowerShell with Admin Privileges, allow scripts using this command.
> Set-ExecutionPolicy Unrestricted
Now locate the PowerShell script.
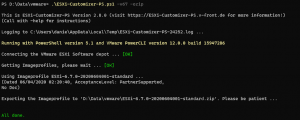
We’re first going to download a Offline Bundle of VMware ESXi 6.7 to a ZIP file.
> ESXi-Customizer-PS.ps1 -v67 -ozip
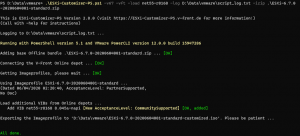
Next we are going to create a ISO using this ZIP file and embedding the Network Drivers.
Change the file names for your file names.
> ESXi-Customizer-PS.ps1 -v67 -vft -load net55-r8168 -izip ESXi-6.7.0-20200604001-standard.zip
Once this is completed, you will have a ISO ready to use.
Creating a USB Bootable Drive
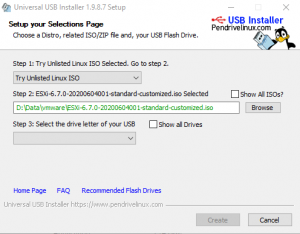
I used Pendrive Linux USB Installer tool to create a bootable USB drive.
- When asked for the Linux Distro, select “Try Unlisted Linux ISO”
- Locate the ESXi ISO that you just created
- Select the USB Flash Drive you want to use
- Format as FAT32 (all data will be lost!)
- Then Create!
You will now be able to boot from the drive and install VMware ESXi.
Error: Relocating modules and starting up the kernel
Some other parts of the hardware is not support so you will get this error on boot.
We need to tell the ESXi system to ignore the Headless state and continue with the boot.
Press “Shift+O”
Then append ignoreHeadless=TRUE to the boot line
Making ignoreHeadless Permanent
Erik over at Tales from the Datacenter has an excellent article on getting ESXi started and making this setting permanent.
When you restart the host, the headless setting will be lost. We need to reconfigure the operating system so this is statically set.
Open a command line on ESXi host, and set the configuration with this command:
# esxcfg-advcfg --set-kernel "TRUE" ignoreHeadless
You can confirm the setting has been committed using the following command:
# esxcfg-advcfg –get-kernel ignoreHeadless
Done!
Please make sure you head over to VMware Front Experience and Tales from the Datacenter to show your support for their work.


