For most Windows users, adding a shared printer to another networked computer is fairly straight forward. However when it comes to adding a printer that is being shared from an Apple Mac, it’s another story.
Your first step is obviously going to be setup Priner Sharing on the Mac.
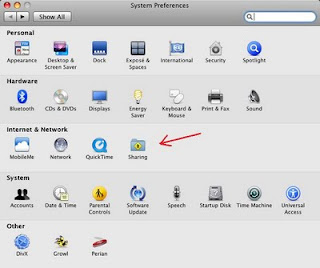
Go to the Apple Menu and select “System Preferences”. Then select “Sharing”.
Go to the Apple Menu and select “System Preferences”. Then select “Sharing”.

In Sharing you will see the option for “Printer Sharing”. Tick this option and then select your printer.
Now that is the easy part. We now go to our windows PC and install the printer there.
First you will need to install a program called Bonjour. This is software from Apple themselves to help us printer from Windows to Mac. It can be downloaded from here (http://support.apple.com/downloads/Bonjour_for_Windows).
Once you have download it, install and run the software.

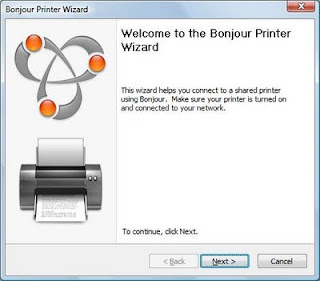
When you start the wizard, it will guide you through setting up all you need to print.
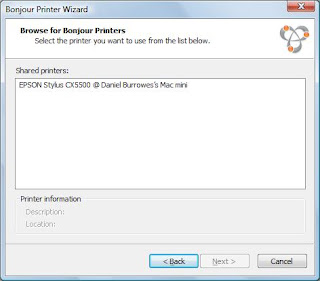
As long as you are connected to the network, the wzard should be able to detect your Apple Mac and the available shared printers.

As you can see in the image above, the wizard has detected my Epson (BTW, I hate this printer) on my Mac Mini. Select your printer and click next.

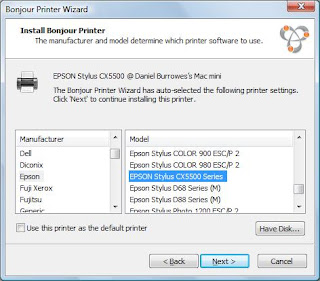
The next screen is where you locate the Windows drivers for the printer. The Apple Mac doesn’t actually have the drivers you need to install the printer. Therefore you will need to either get out the disc for the printer or download the drivers from the website. Once you have done that, you will need to select the “Have Disc…” option. If the drivers are already installed on the PC, the wizard will be able locate and suggest the drivers to install.
Once you have done this, click “Next” and “Finish” and your printer will now be installed on you PC.
